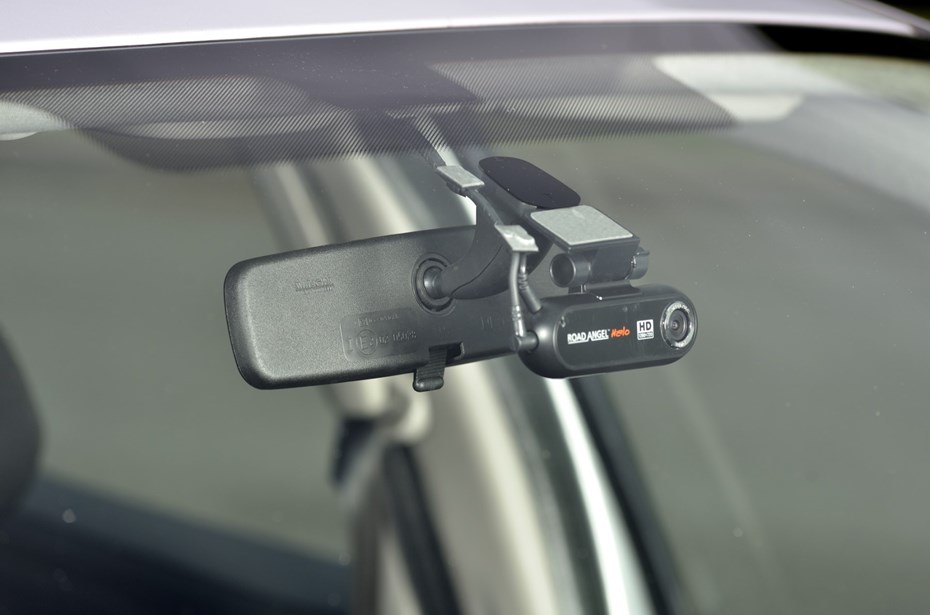
A dash cam is only useful if it’s properly fitted — but dealing with messy cables and occupied USB ports can be a hassle. The solution? Hardwiring. This method of dash cam fitting keeps the device powered at all times while giving your car a much cleaner setup. Many of the best dash cams also unlock extra features when hardwired, such as parking mode or real-time location tracking.
If you’re not confident getting into your car’s electrics, a professional auto electrician or garage can handle the job for you. However, if you want to give it a go yourself, here’s a simple guide to hardwiring your dash cam.
1. Preparing for dash cam installation
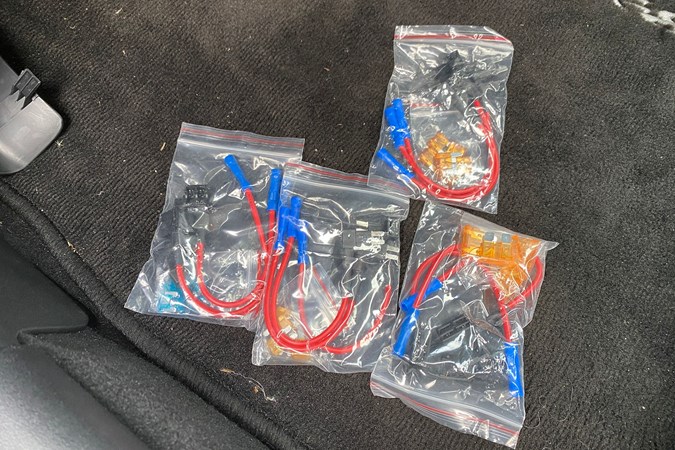
First, you’ll need a hardwiring kit that’s compatible with your dash cam. Most kits for permanent dash cam installation are specific to the manufacturer, and typically include everything you need such as fuse taps, cables and sometimes a voltage converter to ensure your dash cam receives the correct sort of power supply.
2. Locate the fuse box
Your car’s fuse box is likely to be somewhere behind the dashboard. It may be below the steering wheel; in some cases it’s only accessible from the glovebox. Don’t worry if you’re struggling with the search – your car’s manual will provide all the relevant information on how to locate it. The fuse box is crucial because it’s where you connect the dash cam for a clean and reliable power source.
If you don’t have a fuse box in the dashboard, glovebox or footwell, there are two options. Older cars may have a standard ISO car audio loom that can be tapped to provide (you’ll need a suitable connector), or you can get a longer cable that will reach fuse boxes in the boot or under the bonnet.
Experienced dash cam fitters know there are plenty of other options, but they’re specific to particular cars and may involve splicing into the wiring looms. If you’re in any doubt, get a competent and qualified auto electrician to carry out that type of dash cam fitting.
3. Select a fuse slot
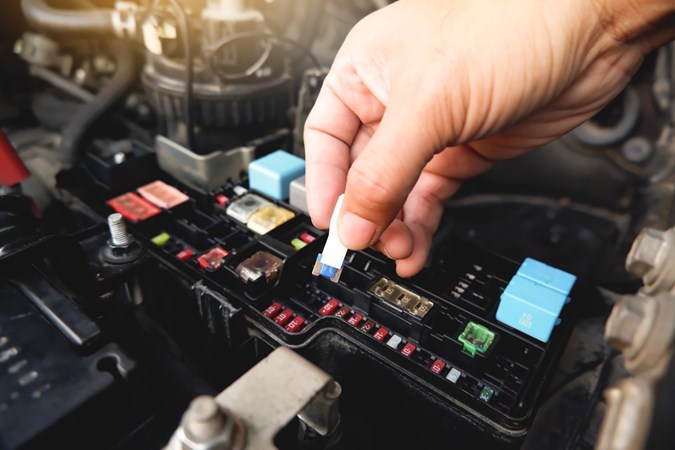
Once you’ve located the fuse box, the next step is to remove its cover. It’s usually secured with a simple clip that can be easily disengaged by gently pulling it down. After removing the cover, place it somewhere safe, like the glove box, since it might not fit back on after the dash dam’s cables have been installed.
With clear access to the fuse box, it’s time to choose a suitable fuse to serve as the power source for your dash cam. Identify the das cam power cable’s permanent (always on) and switched feeds (only provides power when the ignition is on), and match these with the corresponding fuses in your fuse box. Using two feeds tells the camera which mode it should be in. And, in most cases, it avoids flattening the car’s battery
Choosing the right fuse:
Permanent Feed: Select a fuse that provides constant power. This will allow the dash cam to operate in parking mode, monitoring your car even when it’s off. Suitable options often include fuses for the car’s security system or interior lights.
Switched Feed: Choose a fuse that’s only active when the ignition is on. This ensures the dash cam powers up and starts recording when you start the car. Fuses for features such as the radio or cigarette lighter are good choices.
Don’t worry if you’re unsure about the function of each fuse. Your car’s manual includes a diagram of the fuse box and gives detailed descriptions of each fuse’s purpose. Additionally, some vehicles have a label or diagram inside the fuse box cover itself, which can also help identify the function of each fuse.
Alternatively, you can buy a cheap multimeter and test the fuse you’re hoping to use to find out whether it’s constant or switched power. Set your multimeter to measure resistance, then put the positive probe into the fuse holder and find some bare metal on your car’s body for the earthing probe. If the multimeter shows a reading with the ignition off, it’s constant power. If it only shows a reading with the ignition on, it’s switched power.
4. Remove the existing fuse
Using a fuse puller (often included in the fuse box), gently pull out the fuse you identified. It’s not recommended to use your fingers at this stage, as it can be hard to remove the fuse without damaging it.
5. Insert the fuse tap
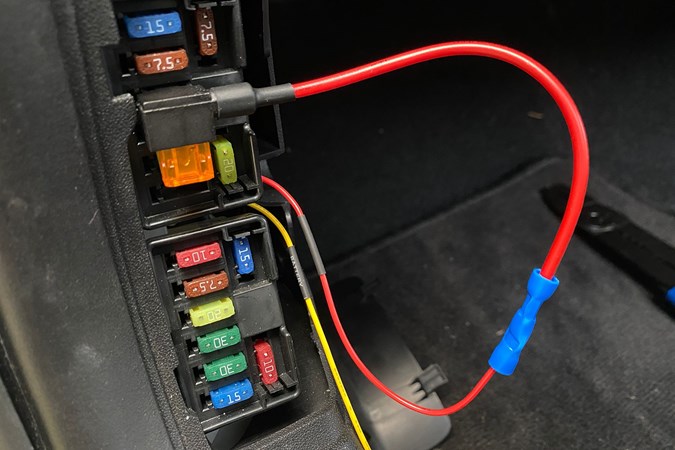
The fuse tap will have two slots and a wire (or wires) attached to it. Insert the fuse tap into the same slot the original fuse was in. This is a crucial step because it ensures that the fuse tap taps into the same circuit as the original.
The fuse tap will have a slot for the the original fuse and a slot for the new fuse. Insert the original fuse into the slot on the fuse tap labelled ‘Original’ or ‘Fuse.’
6. Add the new fuse
Pop a new fuse into the slot on the fuse tap marked ‘Add a circuit’ or ‘Add.’ This fuse will power your dash cam. Just double check that this new fuse has the same rating that’s recommended for your device.
7. Connect the wires to your dash cam
Hook up the wires from the fuse tap to your dash cam. Just follow the wiring instructions that came with your device to make sure everything’s set up correctly.
8. Test the installation
Last but not least, securely put the fuse box cover back on. Turn on your car to ensure your dash cam powers up correctly. Check that the fuse box closes properly – if needed, you might have to make a small modification to fit the new wires in. Finally, double check that everything is functioning as expected.
Choosing a spot to install a dash cam
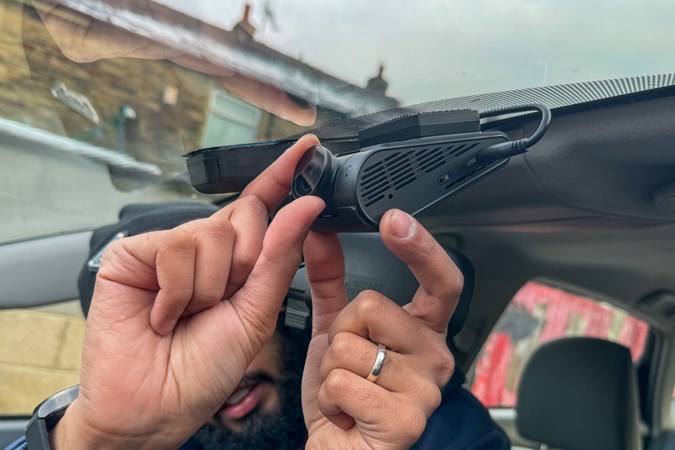
Find a position that minimises obstruction, usually between the rear view mirror and windscreen. make sure it’s centred and then work out how much cable is needed to run along the top of the windscreen and down the passenger side pillar to reach the fuse box. Why the passenger side? Unless your fuses are very easy to access, you’ll have a much nicer job not trying to work around the pedals and steering wheel.
Adding a rear-facing camera
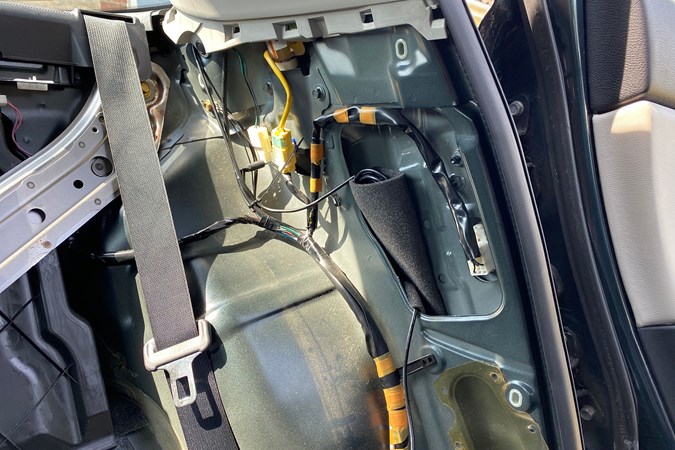
As a rule, the easiest route for a rear camera power cable is along the sills and up to the camera. Sill trim is often easy to remove and far away from airbags. If it isn’t secured with screws, you’ll usually find instructions online to avoid hidden clips. On many cars, it just lifts up and pops out.
Be careful when feeding wires near airbags during dash cam installation. Use foam wrapping, cable ties and 3M sticky cable holders to secure loose cable so it doesn’t rattle. Don’t run cables along the roof or pillars where they could interfere with curtain airbags. If in doubt, follow the edge of the window and the shortest route to the floor, or stick to factory wiring paths.
Once it’s fed in, join the fuse cables properly with crimps or solder and heat shrink. Check everything still works as planned, then put the trim pieces back in place. If there are screws to hold the trim double check you’re not about to trap a cable.
Tempted by a dash cam set-up that watches what’s going on behind you, as well as in front? Have a look at some of the top options around in our guide to the best dual dash cams.
Preparing a dash cam in a car for long-term storage
Now you’ve got the dash cam fitted and hardwired, you’re almost done. There may be a couple of extra steps though, such as setting a battery protection voltage.
A large memory card is a good upgrade for cars left parked in busy areas for long periods, and if you have a connected/cloud dash cam, there are obviously benefits to parking near suitable Wi-Fi access. If your car is in long-term storage, use a battery conditioner or solar panel to keep the battery topped up and camera active.
As a last resort, there are battery backup solutions, both manufacturer specific and generic, to keep your dash cam running. For the best overall protection, a dash cam with front, car interior and rear-view cameras, plus 4G/LTE connection and a battery backup, is ideal. That’s even better if it’s supported by good cloud storage and stable apps.
FAQs
-
Is it really worth hardwiring a dash cam?
Yes, we think so. Hardwiring a dash cam creates a tidier setup and provides the ability to use parking mode. It’s a clean, reliable solution, though it may require a bit more effort to install.
-
What is the best dash cam?
The best dash cam currently available is the MIOFIVE S1 Ultra. It's reliable, records high-quality video, has lots of useful features and is good value. Read our full MIOFIVE S1 Ultra review.
-
Where is the best place to put a dash cam?
A forward-facing dashcam should be fitted somewhere it doesn't impede the driver's view out of the windscreen. The top, bottom and corners of the windscreen are usually the most unobtrusive places. Many people put them below the rear view mirror, but it's better to put a cam between the mirror and windscreen if possible. Same goes for a rear-facing camera in the car's back window.
-
Do dash cams record when I'm not driving?
Hardwired dash cams keep recording when the car isn't moving. If you've parked up, it'll keep recording until a voltage limit is reached, or the memory card fills up.
-
Will the dash cam stop automatically when I turn off the car?
If you hardwire your dash cam to an ignition-switched fuse, it will automatically turn off when the vehicle’s ignition is off. If it's wired to a constant power source, you may need to manually turn the dash cam off, or it will continue to record until its designated cutoff voltage is reached (if you have a voltage cutoff device), or the memory card fills.
-
Which memory card is best for dash cams?
We think the SanDisc High Endurance MicroSDXC is the best memory card you can put in a dash cam. Make sure any memory card you use in a hardwired dash cam has enough capacity to record several days of footage.
-
How long should it take to install a dash cam myself?
There's no one-size-fits-all answer, as the time it takes depends on your familiarity with the vehicle's electrical system and the complexity of the installation. If it's your first time working with car electronics, it may take a few hours. However, if you're already familiar with your vehicle and have experience with dash cam installations, it could be done in as little as 15-20 minutes.
-
Will my dash cam drain my car's battery?
When your dash cam is hardwired, it’s running off the car’s power, so its internal battery or supercapacitor is just there to save files if the power cuts out. Generally, it can run in parking mode for a few days without really draining your car's battery. Most hardwiring kits have a low-voltage cut off to make sure the battery doesn’t get too low.
Just so you know, we may receive a commission or other compensation from the links on this website – read why you should trust us.
Sign up to the Parkers Newsletter to keep up to date with more of the latest reviews, news, and recommendations from the Parkers team.
Just so you know, we may receive a commission or other compensation from the links on this website - read why you should trust us.


